Review: Battle for Stalingrad – The Epic East Front Battle Game (DVG)
Posted by Andreas Ludwig on July 2, 2014
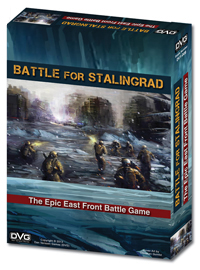 Game: Battle for Stalingrad – The Epic East Front Battle Game
Publisher: Dan Verssen Games (DVG)
Published in: 2014
Designer: Dan Verssen
Era & Topic: WW2/ Urban Warfare in Stalingrad
Game Type: Card Game
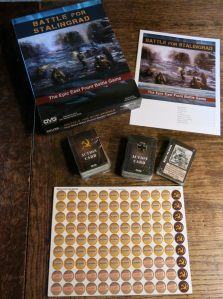
Contents: 168 Full Color Cards, 1 Full Color Counter Sheet, 1 Full Color Rulebook
Number of Players: 2
HFC Game-O-Meter: E 
Our Rating (1-10):
Graphic Presentation: 9
Rules: 9
Playability: 8
Replay Value: 9
Overall Rating: 9
| PRO | Quick set-up, well written rules, many options despite using simple mechanics, fitting to the historical theme, both sides play differently, enthralling and tactical game play… |
| CONTRA | …that might be slowed down because some cards are not as clear in their meaning as they should be; Uranus cards can be crippling for the German player if no counter cards are in hand; a tracking sheet for combat would have been nice |
Introduction
Many (if not most) wargamers who are interested in the World War II topic are particularly drawn to the fightings of the Eastern Front. The fierceness of the battles fought on that front, the gigantic scale of this Clash of Titans, the different style of the tactics used by the Soviets and the Germans, all this seems to create the background for a scenario that is ideally suited for wargames.
Today the name Stalingrad is directly connected to the senseless brutality of war and is the epitome of the war of slaughter fought on the Eastern front. When the Wehrmacht started the largest invasion in the history of warfare, Operation Barbarossa, the invasion of the Soviet Union, with more than 4 million soldiers, 600,000 motor vehicles and 750,000 horses along a front almost 3000 km long, the city of Stalingrad was rather unimportant – as General Field-marshal Paul Ludwig Ewald von Kleist said:
The capture of Stalingrad was subsidiary to the main aim. It was only of importance as a convenient place, in the bottleneck between Don and the Volga, where we could block an attack on our flank by Russian forces coming from the east. At the start, Stalingrad was no more than a name on the map to us [Clark, Lloyd, Kursk: The Greatest Battle: Eastern Front 1943, 2011, page 157]
In the course of the later events of the war, it became a battle of prestige however – for both Hitler and Stalin – and this caused it to turn into one of the bloodiest battles of WW2. For over 5 months, the city saw extreme close quarter battles, soldiers fighting for single rooms in buildings like grain elevators, apartment blocks, factories, warehouses etc. or for other ‘strategic points’ like streets, staircases and sewers and both sides had high casualties to suffer. The nerve-wrecking close combat and man-to-man killing (which was called Rattenkrieg (rat war) by the German soldiers) was accompanied by the terror of artillery and air attacks that laid the city into ashes. The harsh winter weather, a lack of supply and ammunition because of a complete encirclement of the German forces in the city in the later stages of the battle, and the ability of the Soviet forces to bring in reinforcements eventually ended the Battle of Stalingrad and resulted in an total of about 2 million Axis and Soviet casualties.
Because of the fact that wargamers usually have the historical situation in mind and know a great deal of their era of particular interest, there is always the point of “how close and how accurate can a wargame be” in regard to the historical battle and how good it works as a game. The new DVG game we are reviewing here was announced with the promising words:
The Battle For Stalingrad puts you in the rubble-strewn streets as the German forces fight through one block of the city after another. The only hope for both sides is to secure the city before they run out of blood and food.
As the game unfolds, you’ll see one section of the city after another ground into rubble by your ceaseless fighting. As the city deteriorates, the amount of supplies generated for your men decreases. Supplies are the lifeblood of your army. Without them, you cannot move or attack, and you’ll suffer higher casualties in combat.
In the end, you’ll be scrambling through the ruins, as much in search of food as the enemy.
Let’s see if the PR announcement actually matches the game experience and what you can expect on your table 🙂
Presentation
Battle of Stalingrad (BoS) is a card game that comes in a very sturdy box that has a glossy finish, giving the feel of quality even before you open it. The first thing you see is the striking cover art done by Christian Quinot (who also did the great artworks for DVG’s Cards of Cthulhu game), evoking a feeling of desperation and chaos that seems rather fitting to the topic of the game.
When you open the box you’ll find the 168 cards, a full color counter sheet with the markers necessary to play the game (in fact only three different sorts of markers: ration, rubble and hero service medals) and 1 full color rule book. There’s no die included in the box because you don’t use dice in this game – something we’ll come back later to in the actual gameplay description of this review.
The box includes a divider, so it’s easy to store the cards of both the Axis and the Soviet side without them constantly getting mixed together. After separating the counters from the sheet (which is easy to do, the cut is perfect) you can store them in small plastic bags and put them back in the box, which is of the right size – not too much unused space and enough to have everything together without the need to squash it in.
The counters/markers are of good quality and are quite thick. As was already mentioned, there are only three different kind of markers: you get the rations markers, a yellow counter with “Ration” printed on it and a background that to me looks like grain or something. Then you have the rubble marker, a grey marker with the word “Rubble” printed on and the same background as the ration marker – but this time it looks more like concrete (interesting that the same background texture can give a completely different effect just by using another color). There are less rubble counters in the box than ration markers and additionally there are 9 Heroic Service markers.
The 168 cards are composed of 63 Axis Action Cards, 68 Soviet Action Cards, 12 Axis Force Cards, 15 Soviet Force Cards and 10 Location Cards. They are made from cardboard with a glossy finish and although they have a stable feel, we found that they are prone to wear and tear at the edges and even slight pressure with a fingernail leave marks so we highly recommend to sleeve them, which is easy to do because they come in a standard card size and fit into the usual card sleeves.
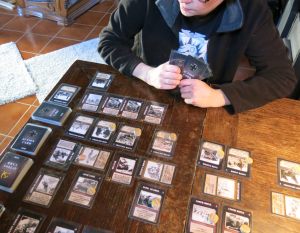
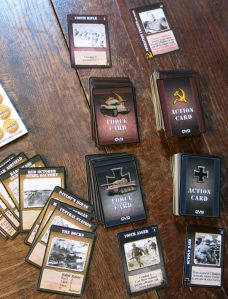
The Axis Action cards come in a mix of black, grey and dark blue color with an Iron Cross on the backside, the Soviet action cards are more black, grey and red with hammer and sickle on the back. Action cards have a historical picture on the front side that illustrates the effect of the card in question, so the Dive Bomber card has a picture of a Dive Bomber, Reinforcements show soldiers rushing in with a motorcycle, playing a sniper card has a photo of a sniper taking aim etc.. The use of actual photos from the battle scene of Stalingrad always fitting quite nicely to the theme of the card you play is a great aspect of this game and takes advantage of the fact that it’s a card game where visuals play an important part because you are constantly looking at your cards.
Besides the historical picture in the middle of the action cards, they have a description on the left side that explains what they are representing (arty barrage, supply raids, sewer warfare, close combat etc.), a Firefight number (which can be + or -), and a text window that explains the actual in-game effect of the card just played.
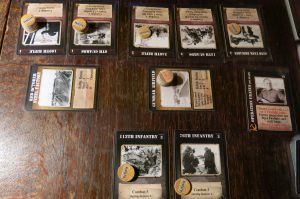
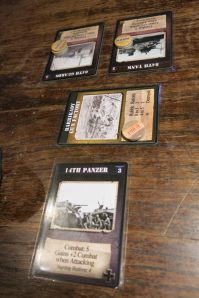
Both factions’ Force Cards come in the same style as their sides’ action cards, but in addition to the Iron Cross and Hammer & Sickle symbols, they have a tank on the backside. On the front you get the identifier for the military unit that it represents, a historical photography, perhaps not from the actual unit (that’s hard to decide from the picture alone) but right from the battle scene, again bringing a lot of immersion and atmosphere to your gaming table. A text window below the pic explains the combat value of the unit, sometimes special effects the unit can bring to the battlefield (e.g. a modifier of the combat value when the unit is attacking, or the ability to last longer in defense). The last important information on a Force Card is a number in the right upper corner of the card, but unlike the Action Card, where this number is the Firefight number, here it’s the cost of the card i.e. how many Action cards you have to ‘pay’ for it from your hand to add it to your actual combat forces, something we’ll explain later.
The Firefight and cost numbers are printed in a small box and some of the numbers are slightly askew, printed a bit over the edges of this small box. We don’t know if this is just the case with our game or if this is an error in the whole print run of the cards and in any case it’s no big deal and you have to look really closely to see it, so it does not affect gameplay in any way.
The last card type in the box are the Location Cards which actually represent the areas within the city that were the sites of major battles and over which the players now fight for control. You have 10 cards, done in a mix of yellow, black and grey again with a great historical picture which is shown on both sides of the card. The front side has the name of the location, the picture and in the section below the pic you have a rubble chart and sometimes some special notes. The rubble chart is telling you under which condition the location still gives ration supplies and how many rubble markers it needs to consider the location to be destroyed.
The full-color rule book has the same glossy style. It is 11 pages long and printed in an easy-to-read font with lots of pictures and examples. In addition, it includes sample game with a two-turn overview how the game actually plays.
Rules
The rules start with a short overview of the Battle of Stalingrad to give some background information, certainly not really needed for the average wargamer, but just in case the player is new to this sort of game, so it’s appreciated to have a bit of historical information included here.
The introduction is followed by the victory conditions and an overview regarding the components, an explanation of the structure of the cards and then the set-up procedure, making the players ready to begin their game.
The games´ short Sequence of Play is explained after that, with many examples given to illustrate the various steps, the movement possibilities of your forces are illustrated well and then there’s the part of the rules where the player is informed how combat works. A rather detailed sample game over 2 turns translates the information of the pages before into a more practical description how the single elements of the game mechanics work together. All in all, there are only 6 pages of actual rules that deal with the gameplay and you might get the impression that this is a rather simple or even simplistic game. Let me tell you that this is definitely not the case and I hope this will become clear in the following parts of the review.
We are of the opinion that it’s nice to have attractive and stylish graphics and quality components in a wargame – like shiny maps and counters etc. But the one thing that either makes or breaks a wargame are the rules. If the rules have problems, you can have the most shiny game on your table but you won’t enjoy it much and so it won’t end up on your gaming table that often.
One general problem with a card (war)game is that the rulebook is not the only means to explain the game mechanics, because some aspects are written and explained on the cards you play.
The rules for BoS are easy to follow and there is no problem to understand the game concept after one read-through of the rulebook. Some cards, however, are worded in a vague way and their effect, their timing during the Sequence of Play or their use in an actual game situation might be open to debate. It affects only a minority of the cards, though – we encountered these ambiguities with the “Scouts” card, the “Fog of War” card, the “Fresh Supplies” card and the “Heavy Weapons” card. It might very well be that we – as non-native speakers – look much closer at the wording and therefore sometimes cause a problem of understanding that a native speaker won’t face at all. Or, as ASL players, we are simply overly squeamish with precise wordings 😉
All in all, the rules are fine, look great and one playing session with the rulebook in hand should be enough to get you going. If you want to take a look, you can check out the rules here on the official DVG website!
Gameplay
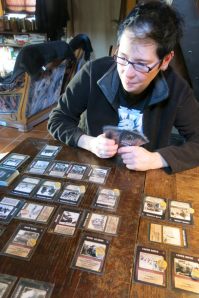
The game is about two players commanding the Axis and the Soviet forces in the city of Stalingrad, where certain locations are randomly chosen over which the fight for control then takes place.
The locations give rations/supply to the side that is controlling them as long as the player can hold them, while the enemy tries to destroy the opponent’s forces to control the location and get the rations himself.
Attacks not only affect the combat units, but also the locations, so for every attack made by whatever side, a rubble marker is added to the location. The more rubble there is in a location, the less rations are available for the units there. At a given maximum of rubble markers, the location is considered to be completely destroyed and is flipped over to the backside. The location no longer gives rations/supply, but still counts toward the Victory Condition and allows the player holding it to draw an extra card in the card draw step, which is a way to take into account that the side who controls a larger part of a battle scene usually has more flexibility to operate.
Units are either located in the Control Area of the German/Soviet side (i.e. they are actually considered to be at the location in question) or in the German/Soviet Perimeter Area, which is an area considered to be somewhere in the city where your forces move around and prepare for the next assault on the locations. Units can move from the Perimeter Area to other Perimeter Areas or directly to Control Areas, there’s the option to advance, or to retreat depending on the game flow and the tactics used by the commanders. The locations differ not only in the rations they provide for the controlling side, but sometimes also have special effects that make them particularly worth fighting for, and so movement is a big part of the game because the players will try to get to the best locations first in order to be better prepared to fight over the remaining ones to eventually claim victory.
Victory Conditions
The players fight over 5 randomly chosen locations and the first side controlling all five of them at the end of any one turn is the winner.
Set-Up:
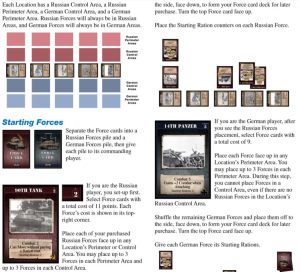
Set-up is easy and fast and doesn’t take much time, so after you have decided who is playing which side (I would say give the more experienced player the Axis forces, because although the game is nicely balanced overall, the German commander has the most pressure, a point to which we’ll return later). Then you take the 10 location cards, shuffle them and deal out 5 cards randomly, the other 5 cards are placed off to the side, they are not needed in the game. The chosen location cards are now laid out in a row (face up) on the gaming table, so they separate the gaming area between the two players. Make sure to have enough space between them so that later in the game you have enough room for maneuver and can easily see which unit is where.
The areas right below and above the location cards are called the Control Areas of the German and the Soviet side, respectively. The next area on both sides of the table is called the Perimeter Area. These areas are where the players put their military units on the table, where they move or prepare to attack the opponent and defend the laid out locations. The players separate the Force Cards into a Soviet pile and a German pile and each commander takes his faction’s forces and puts the pile to his side.
To begin the actual set up, the Soviet player takes his Force Cards and chooses any units he wants as his starting forces. Units have a card cost in the right upper corner and the Soviet player can choose forces up to a total cost of 11 points, then he shuffles his remaining force cards and puts the pile to the side, cards face down, creating his Force Card deck from which he later can buy reinforcements. The chosen units are now placed by the Soviet player face up in any Perimeter or Control Area on his side of the locations. He is completely free to send his units to the locations and areas he wishes, but can place only up to 3 units in each Perimeter Area and up to 3 units in each Control Area (for you hex ‘n counter folks out there, consider this the stacking limit of these areas assigned to the locations 😉 )
The unit cards each have a starting ration number printed on them and this is the amount of ration markers the player puts on them when they come to the battlefield, i.e. when they are placed on the table for the first time.
Now it’s time for the German player to set up his forces – he has the advantage that he can see the Soviet player’s starting forces and where he has his defensive positions. He takes his Force Cards and is also allowed to choose freely which units he wants to roll out against the Russian units, but he is limited to choose cards up to a total cost of 9 points instead of 11. The remaining cards are set aside face down as the Force Card pile from which to buy reinforcements later. In this set up phase, the German player can put his units (face up and up to 3 cards in each area) in his Perimeter Areas of the locations only, not in the Control Area, even if there are no Soviet forces present in that location! It’s simply translating into the game the real-life situation of Russian forces already occupying certain locations in Stalingrad while waiting for the attack of the Germans, who are closing in with their units. When the units are placed on the table, they also receive their starting rations according to the number printed on the cards.
The last thing to do is separating the Action Cards into a Soviet/German pile, shuffling them and then setting the pile aside in easy reach and then drawing the starting hands. The Soviet player draws 10 cards and the German player draws 5 cards. With these starting hands, the game begins with the 1st turn of the German player.
The player taking his turn is called the “Acting Player” and goes through a 3-step Sequence of Play, then it switches over to his opponent, who does the same. Players take turns in this way until one player controls all 5 locations and wins the game. Whenever the Action card pile is depleted, the cards in the discard pile are shuffled and a new Action Card deck is created.
Player Turn
The acting player goes through three steps in his turn, which starts with the Supply Step.
Here the player gets a certain amount of supply for each location he’s controlling. He can freely distribute these rations among the forces in the location. A chart on the location card will give you the exact amount depending on the level of destruction of the location in question. Then all the units in the Perimeter Area receive one ration each, no matter whether they are in a Perimeter Area of a controlled location or not.
Then the Action Step begins.
The acting player is free to choose any possible action in every order he wishes, so he can for example play an Action Card from his hand to gain a special effect like Artillery Barrage, or a Dive Bomber attack to prepare for the actual assault with his combat units, or something more strategically like a Scout card to search in his deck for a certain card/effect he wants to use.
There are several interesting options that allow for a certain variety how you actually plan your attack, and some cards can have serious impact on the other player’s forces.
If you play an Action Card that is executing a form of attack (like Dive Bombers or Artillery Barrage), then usually the card tells you how many rubble counters are inflicted on the location and how strong the attack value is that you can bring down on the enemy forces in that location. So there’s a nice possibility here to prepare your assault with some great effects and weaken the enemy before you close in with your ground forces, but the backside of this is that any rubble caused by your actions not only might lower the amount of supply you get when controlling the location, but often can also be used by the defending forces to hunker down and have some cover. There are also some cards that can use rubble to actually strengthen the attack by the enemy against your forces translating the simple real life fact that a destroyed location is a great place for hiding and preparing an ambush. So one always has to see both sides of the coin here…
The acting player can now also move his forces. BoS is a game that is rather dynamic because of the various options to move your forces around, which is one of the great design aspects here.
Generally there are 3 movement options for you in the game: Perimeter Movement, Advance Movement and Control Movement. You are free to use any of the move types in any order with the only limitation that you can have up to three cards maximum in any area and you can only move a force that has enough fuel, which means – in game terms – being able to pay a ration for this movement action (by discarding a ration marker), so if you have no rations left on a force card, it’s immobilized (unless it’s one of the units that don’t have to pay for movement, a special ability mentioned on their card).
Perimeter Movement means you can move one of your forces from any area to a Perimeter Area on your side. It doesn’t have to be an area adjacent to where the force card is starting the move, you are free to move around on your side of the table as you see fit, be that from another Perimeter Area or a Control Area of a certain location.
Advance Movement means you can move a combat unit from a location’s Perimeter Area to the Control Area of that location. It doesn’t matter whether the enemy controls the location or not, advance is just that – advancing your forces to a certain location from your side of the table.
Control Movement allows you to move one of your forces from any Perimeter or Control Area to a Control Area of a location that is either under your control or uncontrolled.
The necessity of having to pay for movement and that these different types of movement allow for different speeds in moving your forces, makes it important to actually plan your assaults carefully in advance. If you control a location, it’s easy to reinforce it from anywhere by paying a ration per force you want to move there, no matter where the unit starts. But if the enemy is controlling the location, you can not just rush in – you have to combine the different movement types and it will cost you more. Say you have a strong unit in a location’s Control Area after a battle and now you need this unit to attack another location controlled by the enemy. You can not simply move sideways from one Control Area to another, but first you have to make a Perimeter Move (bringing the unit from the Control Area where it starts to the Perimeter Area of the location you want to attack, paying one ration) and then you have to announce an Advance Move from the Perimeter Area of the enemy controlled location into the Control Area of that location (again paying one ration). Combined with the fact that everything in the game (be it movement, attacks or absorbing hits) cost rations, it becomes obvious that planning ahead how to act and react is important here – or otherwise your plan could be easily screwed by realizing that one strong unit you thought would bring the decision is not able to attack anymore because different moves already used up all of its rations…
The acting player may also perform a Resupply Action which is done by discarding one Action Card from his hand to get 2 rations that he may freely distribute among his forces. Or he may perform the Buy Forces Action to bring some reinforcements on the table, paying the cost of the top card of his Force Cards Deck (shown by the number in the upper right corner of the card) by discarding as many Action Cards from his hand. The new force card is then placed either in any of the players Perimeter Area, or in the Control Area of an uncontrolled location or one controlled by the player – the maximum of 3 cards per area still being the limit. Then the force card is given the starting ration amount that is printed on the card. Now the player can turn the next card of the Force Card Deck face up, so you are not allowed to see which card will follow the just purchased force until you have paid for it and placed it on the table – you don’t know what the commanding HQ is sending your way as reinforcements!
Attack is always an option for the acting player, when both sides have forces in the Control Area of a location. The acting player announces an attack and has to discard one ration from every combat unit that is participating in that attack (defending units don’t pay for this combat, though!) and to place a rubble marker on the assaulted location. Then the firefight begins.
Firefight
In this part of the game, both players count their forces’ firefight values (the number in the upper right corner of the unit cards) and so know the starting strength of both sides involved.
Both players can also choose to play Action cards from their hands, which have a certain effect on the battle, for example, the amount of rubble is added to the calculation, a unit doubles its inherent strength, all combat units become stronger than their printed value, or players are forbidden to play firefight cards etc..
Instead of playing a card for its “Action effect”, the attacker then starts playing an Action Card as “Firefight card” from his hand, in order to use the firefight value of this card in the battle (the number in the upper right corner), which can be positive or negative. A positive number is placed besides his forces, thus adding to the firefight value of the combat units, a negative number is placed besides the forces of his opponent, subtracting the number from their firefight value. A card can be either played as an Action Card or as a Firefight card, but never for both effects.
Then the defender can decide to play a Firefight card from his hand, also adding positive cards to his units, placing negative cards on the enemy side. Both players can play cards this way from their hands until both players pass in succession. As long as only one player declines to play another card, the other player is free to either also pass (which would end this part of the battle round) or play another card. When both players decline to add more cards (or can’t do so anymore because they have no cards left in their hands), they flip the top card of their Action Deck adding any positive number to their own side again, subtracting any negative number from the opposing side.
Then both players count their forces’ firefight values, modified by the positive and negative numbers given on the added firefight cards, the result is the total of Hits inflicted on the other sides’ forces.
The last step in such a battle is then absorbing the hits by discarding as many rations from the forces participating in the battle as hits were inflicted on them. One ration can absorb one hit this way and you can do so as long as rations are available on the force card to discard. You can also absorb 2 hits by retreating with a unit from the Control Area to the location’s Perimeter Area (keep in mind, the limit of 3 units per area is still relevant here! So if you brought 3 units into the location’s Perimeter Area, because you thought you would win the battle and then could make some fast rearrangements with your forces standing ready, you would have to face the fact that no retreat is possible anymore). The players can combine retreating units and paying with rations for absorbing hits, but any hit that is not absorbed, hits the target – and a force is destroyed by one hit! You can decide which unit from those who participated in combat is destroyed to pay for the inflicted hits total and you can also destroy a unit that already retreated to absorb hits, the retreating unit is still part of the battle’s attack resolution.
Destroyed units are placed face down at the bottom of your Force Cards Deck and will become available again when these cards are purchased performing the Buy Forces Action.
If you control the location after the battle (i.e. you have at least one unit in the Control Area) and all enemy forces were destroyed, you can place a Heroic Service Marker on one of your forces that participated in the battle to distinguish the unit for their performance in combat – both the attacker and the defender can award their units such a Heroic Service medal, as long as both conditions are met. A unit can be awarded more than one time this way and for each Heroic Service medal on a force card, the unit gets stronger in attack (+1 combat value) and defense (it can absorb one extra hit when retreating), so having a veteran unit with some Heroic Service medals on it can give you a real powerful force in battle!
When the player is done with all the actions he wants to perform, the last step in his turn is to Draw Cards.
The acting player draws 5 cards from his Action Deck and he will get one additional card for every location he controls (this number can be reduced by Action cards played by his opponent).
There is no hand size limit, you can hold as many cards as you wish. Your discard pile is shuffled to form a new Action Deck if your cards run dry.
Replay Value
Replay value is always an important aspect of any game and that’s one of the many strong points here: each game is unique because of the possible variety based on the combination of having certain options, depending on the cards you can use and the many effects they can have, combined with the randomization of the card draws.
Both sides can use similar effects, which nicely adds to the overall balance of the game (some cards are unique however, for example the Uranus cards of the Soviets) and there’s always the challenge to see what you can make out of the situation the card draw put you in, while the opponent does the same.
There’s a good deal of bluffing in the game, like in a good poker match, because you don’t know which cards the opponent has in his hand, what he will use in the combat that is just to begin and which fight he will support the most with his available cards.
You always will have to make important decisions, do you buy more reinforcements with your action cards to get more firepower in the next turns, or are you afraid that paying with too many cards might weaken you too much when the opponent starts his assault? Then there is always the question whether you want to use a card for it’s very strong firefight value, or for its Action card effect?
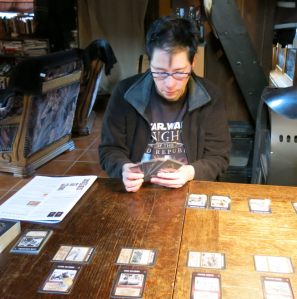
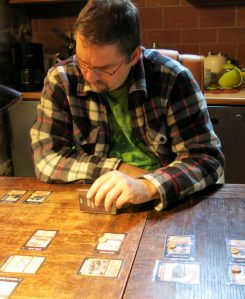
The game hit our table quite often because we both felt the need to fine-tune our strategies. Despite the fact that experience in the game definitely gives you much better confidence in what you can do and how you should prepare for the key battles in the match, there’s always the uncertainty because you don’t know which cards Fortuna will grant you this time. That keeps the game fresh and makes sure the gameplay is always tense.
The game appears to be very well balanced. Since both sides have different advantages (the Soviets start with more points to buy forces with, the Germans have the stronger units etc.) the Germans and the Soviets actually play differently and the fact that always all 5 locations have to be captured and held to win, makes this a great game of tough challenges, important decisions and unpredictability – that means, with a really high replay value.
Simulation Value
It’s a card game and the rules are short and rather simple, this is not ASL or Totaler Krieg, which means the lack of rules might translate into a lack of simulation value and of course – on a certain level – it does, because the more rules you have, the more options a game can allow the players to use.
But one always has to keep in mind what a wargame wants to portray and what is the actual level of focus in the game – and here BoS absolutely nails it. The close-quarter-battles, the brutal fighting, the swiftness of the combat based on tactical decisions, the ebb and flow of won and lost strategic locations, and the pressure that the Germans faced in the Stalingrad battle is all portrayed here and translated into simple, but absolutely convincing and elegant game mechanics.
The importance of supply (needed to move your forces into gear and deciding why you go for specific locations in a certain order), the strength of some combat units (either more in the attack or more in a defensive position), the idea that a location gets destroyed when both sides fight there and so give the defender an advantage because of additional cover, the possible hold-up of the German attack speed due to the Uranus cards that have serious impact on the game when the Soviet player brings them on the table, the movement rules that allow for tactical gameplay based on strategic thinking – I was often reminded of the great battles we fought in Up Front and it’s quite astonishing that a game like this with just a few pages of rules can be so satisfying when it comes to simulation value, something wargamers always hope to find in a game.
Solitaire Playability
Low, as in almost any card game where the tension of gameplay comes from the bluffing and not knowing what the opponent will be able to throw at you when you start an important combat. Of course it could be done technically, but I suppose there’s not that much fun in it and it misses the point of the game. For solitaire gaming, there are better options, especially from DVG, a company specialized in Solitaire wargames.
Can be compared to:
As I already said, the game reminded us of Up Front – although the portrayed level is higher (BoS is not skirmish but it plays very tactically).
Hell of Stalingrad is a game that comes to mind, also a card wargame, the Germans have to clear all buildings to win as well, many cards and many effects on both sides, the use of historical photos, also a game of bluffs and important decisions, but BoS allows for more consistent planning and while in HoS the preparation is all for one final roll of the dice that will decide the battle, BoS gives you more control in how much emphasis you put on a certain combat, due to the combat factors you can add from your hand while fighting for a location. Battle of Stalingrad also differs from the garish graphic style used in HoS.
Perhaps the best comparison is Lightning D-Day, a game published by Decision Games, but still a Dan Verssen design. BoS is not as scripted as Lightning D-Day and it has a longer playing time and much more options and variety, but the core mechanics are quite similar with the use of the Action Cards and the firefight value for combat the players add together based on their Force Cards dedicated to battle. Also the theme is equally strong because of the use of historical photos.
One might say Battle of Stalingrad is an advanced concept of the simpler Lightning engine, so if you are a fan of this quick filler game, you should be even more satisfied with what you get in the BoS box.
![]() Andreas Ludwig’s Conclusion:
Andreas Ludwig’s Conclusion:
When we received Battle of Stalingrad, we were not really sure what to expect and started the game with an open mind, so to say.
What at first looked like just another card game loosely based on a historical setting, soon became one of our favorite games! Quickly realizing that this is a game of historical flavor as well as accuracy (as far as a card game with just a few pages of rules can go), a game that demands thinking and quick decisions, we were hooked by the elegance of the game system.
There are games which you want to bring back on the gaming table because you think you can do better than last time, this ‘just one more try to see if that might work…‘ impulse that even keeps you thinking about the game after you put it back into the box… and Battle of Stalingrad is exactly such a game. We played quite a lot of matches and all were different in how they proceeded and in their outcome. All of them were exciting sessions to play, we had fun and tried to maximize our sides’ possibilities.
The game is well balanced, both sides can use the same effects most of the time, and the better numbers of the Soviets are matched with the stronger units the German player can bring on the table.
The pressure, though, is definitely on the German player who must have a good plan to break through the Russian defense and a simple rush-in often leads to a quick defeat.
On the other hand, too much preparation costs too much time and that allows the Soviet player to strengthen his defense turn by turn… as long as he controls a location, he receives constant supply and when you – as the German player – see the number of ration markers increasing on the Soviet combat units, you feel the pressure. If you wait too long, the Russians will have so many ration markers, they can probably absorb all hits you can afflict on them, holding their position, while you have to retreat or see your forces destroyed by the fire of the defender. That can leave you out in the rain when it comes to your opponent’s counterattack… but press on too soon, you might just not have enough firepower to clear and capture a location, burning valuable cards to no avail.
Maneuver is very important here and although being a card game, this is not just placing your cards and fight, it’s essential to move your forces into positions so they can support each other, to see possible holes in the defense of the other player and to try to cover what you really have in mind with some moves for distraction and then suddenly throw in everything you have on the frontline to drive the enemy out of this strategic location that will give you the needed supply rations for your overall plan to work. Hoping that all goes well and that you win the battle quickly to reinforce the location with strong units to hold it, hopefully daunting the opponent so he is not going to attack it immediately in his turn again because you don’t want to see all the supply covered by rubble…
Using the cards you have in hand to support the combat that is going to happen soon with high firefight numbers, or paying with them for the strong unit you can see as the top card of your Force Card Deck… or perhaps just buying the weak unit because you so desperately need a strong unit that might be just next there under the weak force card… but you may give away precious combat power just to reveal another poor unit weakening you even more.
Waiting to strike because you have the powerful arty barrage cards already in hand, just one more dive bomber would come in handy to really soften the Russians who sit there behind their ever increasing columns of ration markers… and when everything is finally ready and looks promising, you announce the attack – and then your strongest unit suddenly gets pinned by Sniper fire and cannot move! Or to lose a valuable veteran unit decorated with Heroic Service medals because you didn’t plan the attack wisely and lost the force since it couldn’t retreat.
The Uranus cards are perhaps the strongest tools the Soviet player can use to really cause a severe headache for the German player. There are 6 Uranus cards in the Soviet deck and the Soviet player can play them (when he has them in hand) for a certain Action Card cost he must pay. As long as the card is active, the German player suffers heavy penalties which can slow him down a lot and weaken him in many ways. To get rid of the card, he has to pay and usually what he must do to remove the card is also very painful for him, so if such a card is on the table, it will be tough for the Germans either way. To make things worse, there can be more than one Uranus card on the table…
It’s not a game breaker, though, because the German player can often cancel the effect of the card with a Fog of War card, but of course to do so he must have such a card in hand (with a Scout card, he can search for such a card in his deck to put in his hand right away – but he must have a Scout card of course…). Usually, if the situation looks grim for the German player and the Soviet player brings out an Uranus card without something to counter in the German hand, a game can go south quickly…
It would have been nice to have some sort of marker or display to keep track of the firepower numbers in a combat round, it can sometimes be a little confusing when all the numbers have to be added and subtracted. We had no problems with that after some games (we used dice to keep track of the damage dealt in the attack), but a simple tracking sheet (like this one) would have been sufficient and should have been in the box.
Battle of Stalingrad is a great game with surprisingly deep gameplay, given that the rules are so simple, but the mechanics just work in an elegant way and provide the players with a game full of tension, historical immersion and tactical thinking.
For me, personally, one of the best games so far that hit our table this year and highly recommended! Especially if you are a wargamer who likes East Front games and card games: if you don’t play this game, you gonna miss a true gem 🙂





Kenneth Stein said
Very surprised to see the comment “The game is well balanced”. We have found that the Russian side has way too many advantages, from the start and as the game progresses. Just too many cards available to thwart German actions. The Uranus cards are absolute game breakers. Many house rules are needed to even up the game. A shame, because the design and components are excellent.
Andreas Ludwig said
Hi Kenneth,
thank you for your comment. But, given that the review is from 2014 I now can only say that apparently at the time when we played the game (and that over a period of time) we had the impression that it is well balanced. In our gaming sessions we didn’t see the need for house rules and we would have surely mentioned it since we don’t really like house rules to make a game worth playing – that wasn’t the case with Battle of Stalingrad, at least when it was on our table 🙂
Happy gaming!
Mike said
Great review, I really enjoyed it. 🙂
Andreas Ludwig said
We are glad to hear that Mike – enjoy your stay on our website 🙂
Jim said
In this paragraph above:
Firefight
In this part of the game, both players count their forces’ firefight values (the number in the upper right corner of the unit cards) and so know the starting strength of both sides involved.
Shouldn’t it say “Combat Values” rather than “Firefight Values”?
Andreas Ludwig said
Jim,
well the rules use the term “firefight value” and combat is actually called “firefight” in this game, so we are just using the “official” terms 😉
John M said
Good review, but I am surprised you did not comment on the absence of a map. I would think that without it, the game would lack the physical locations and their proximity to each other that give it a historical context and drive the fighting to be more intense in some areas and not others. Lacking a map, you can change the names on the location cards and it could be any city.
Andreas Ludwig said
John,
thanks, glad you enjoyed the review 🙂
Well, BoS is a card game and as such has no map, only a few card wargames use a map anyway so the ‘absence’ is hardly surprising. And it doesn’t need a map either. So that would have been just one sentence to add to the review and it’s rather stating the obvious imho. I explicitly said in the review that the strong historical theme is there and it’s because of the historical pics on the cards. You can change the names of the location cards, but you will still recognize them as locations in Stalingrad, so no, it could not be ‘any city’. 😉
Thanks for reading!
victorianec said
Thank you for intresting review! Agree that game looks like more intresting and clever version of lightening game series. Can you help with some rules? I post it on bgg, but have no answer – http://boardgamegeek.com/article/16163832#16163832
Andreas Ludwig said
I replied over at BGG 🙂
victorianec said
Thank you very much for answers! In our game parties – 16th Panzer very quickly became unstopable monster thanks to unlimited movement. After battles at the end of turn, player often moved it on perimetr and on next turn have + supply and can choose , rather often after first 3-4 turns a lot of russian troops died and we do not find (up for today) how to stop this killer-machine – 16th Panzer. Only collect snipers card, but if you have no them – what to do?
Andreas Ludwig said
I don’t know, as I said, we rarely have that many hero medals on a unit and what you describe seems to be a strange situation. Especially in the first turns usually the Soviets can hold their ground quite easily, the German player must bring enough firepower to the battlefield but this comes at a cost, he only has 9 points in the beginning to spend for units and starts with fewer cards in hand, so the Soviets can often last longer in battle in the opening game. We played many games and never had the problem of such a ‘killer card’ rampaging over the table.